Get started
Install and find the panel
A Jira administrator installs the app once; after that every issue has an Acceptance criteria panel. It is free.
1. Install
In Jira, open Apps → Explore more apps and search for FeatureBridge Lite.
Click Get it now, choose your Jira site and confirm the permissions.
The app reads and writes Jira issues and keeps its templates in Atlassian's storage for your site. Details: Permissions and data.
2. The panel in the right-hand column
Every issue now has an Acceptance criteria panel in the right-hand column, under the issue details. Its button shows how many criteria are finished out of how many (for example 3/5), or None yet. Open it to read, add and tick off criteria without leaving the details.
3. The full editor under the description
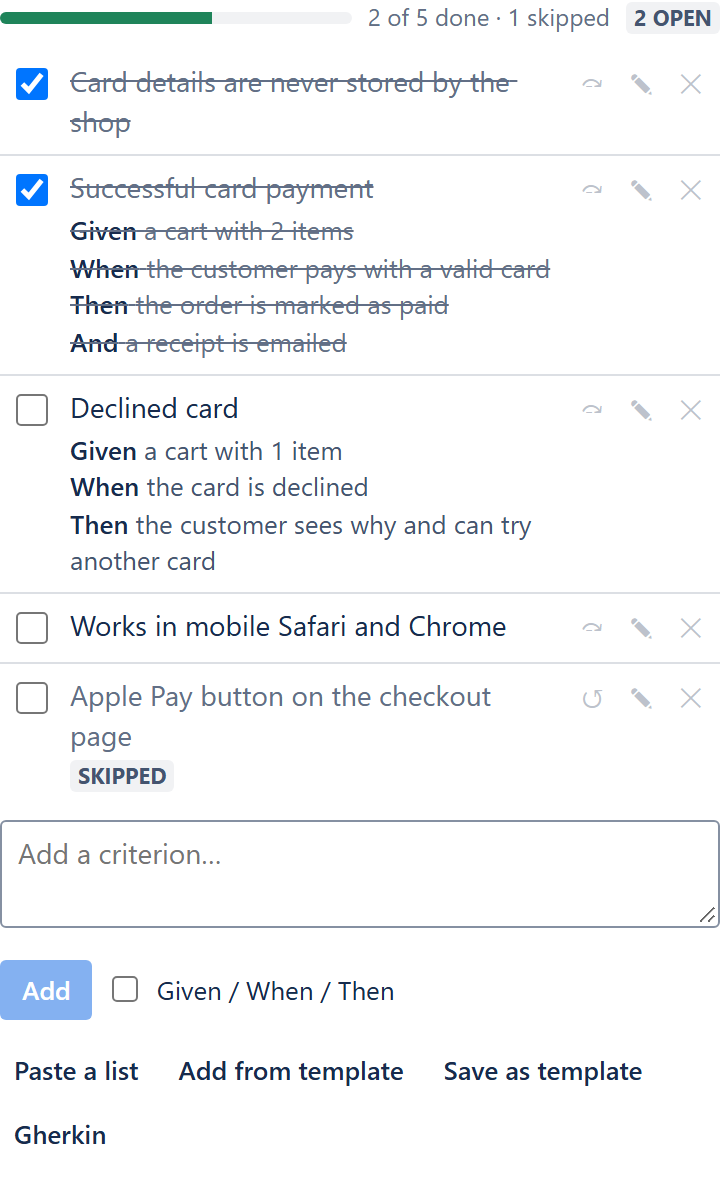
For longer lists and Given/When/Then scenarios, use the full editor in the issue's main column. It adds moving criteria up and down, and has more room for the steps.
Open an issue and click the Apps button under the issue title.
Choose Acceptance criteria. The panel appears under the description.
Jira administrators: in the panel's ••• menu choose Show for all work items to show it on every issue.
Who can do what
- See the criteria: anyone who can see the issue.
- Add, tick off, edit, reorder, remove: people with the Jira Edit issues permission on the issue. Everyone else sees the list read-only.
- Templates on an issue: anyone who can edit the issue can add a template's criteria or save the issue's criteria as a new template.
- App settings (edit and remove templates, default templates): Jira administrators.
Two people editing at once
If someone else changed the criteria a moment before you saved, nothing is overwritten: the panel shows their version with a short note, and you make your change again.